Building a Net Zero ADU in California: A Dual Threat for California’s Housing and CO2 Crises
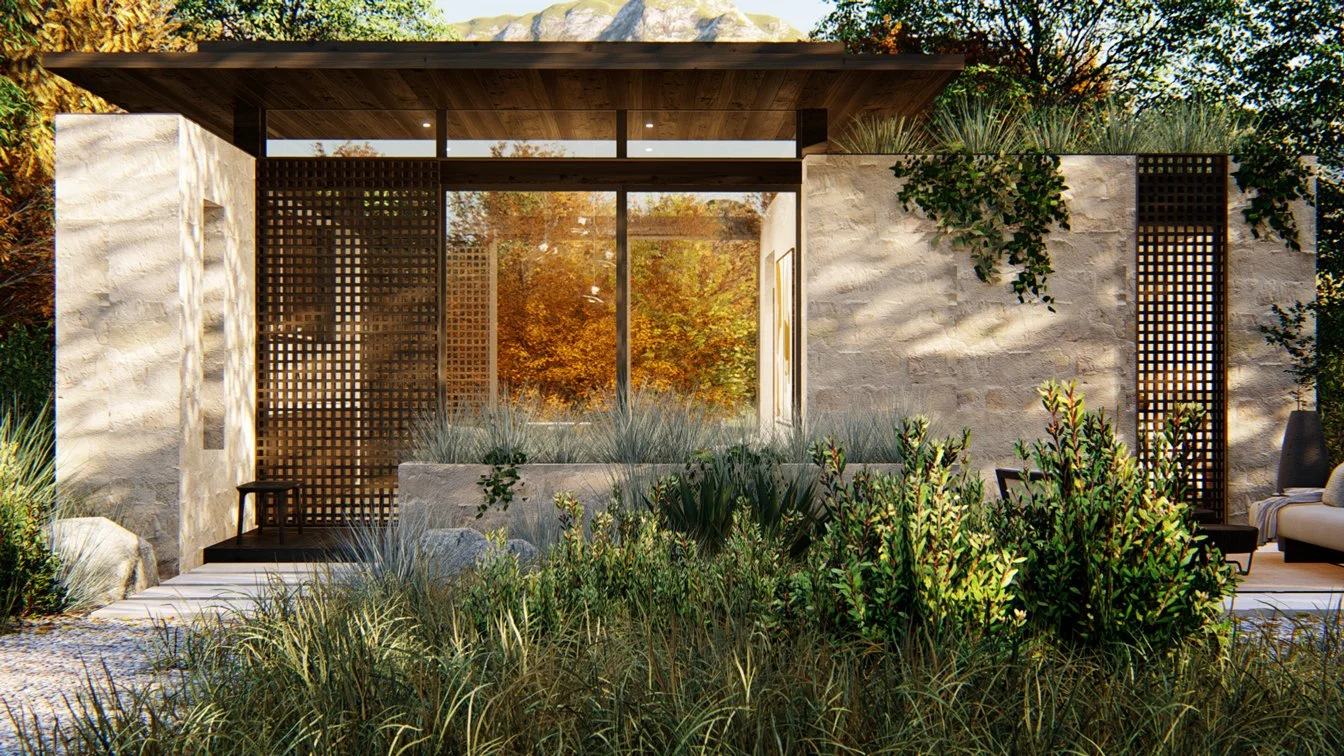
Rost Architects Villa G Accessory Dwelling Unit. 850 SQFT 1 Bed | 1 Bath
With the new California 2020 ADU laws that loosen restrictions on ADU development, we will most likely see a rise in the number of homeowners and real estate developers building Accessory Structures on their properties. The primary intention of the new ADU regulations is to help solve California’s housing crisis, however we see another huge opportunity with the growth of this building type. We feel that with each new ADU constructed in California, we have an opportunity and responsibility to implement, refine and experiment with net zero energy building techniques.
If the ADU movement in California is plagued with poorly constructed low quality ADU structures, this could result in thousands of drafty, poorly insulated buildings that consume much more energy than necessary. This could increase the burden on our already severe energy and CO2 crisis. With simple tweaks in design/construction and the addition of a renewable energy systems, these structures can operate using little to no energy and help solve both our housing crisis and our energy crisis simultaneously.
The question is, how do you design and build a net zero accessory dwelling Unit (ADU)? Below are five tips for making your accessory dwelling unit net zero energy.
Build your ADU with a well insulated and air tight exterior envelope.
To be net zero it is critical that your accessory dwelling unit have a well insulated and have an air tight exterior envelope. This will help moderate the interior temperatures and reduce conditioned air from escaping your building which will allow your HVAC equipment to work less and burn less energy. This means constructing the exterior walls of your ADU using a wall assembly that it a bit more sophisticated than your conventional wood framed 2x6 wall. Although there are many systems and wall types available, our recommendation to achieve a well insulated envelope this is to use either an insulated concrete form wall assembly or an exterior insulated wall system.
Insulated Concrete Forms
Insulated concrete forms are large foam Lego blocks that get filled with concrete. The foam is left in place when the concrete cures and forms a sandwich of insulation and concrete making it a very effective wall assembly with high insulation values. To read more about the different types of insulation, read our article here.
Exterior Insulated Wall Systems
Exterior insulated wall systems are walls clad on the exterior with a thick layer of rigid foam insulation. Over the rigid insulation is usually a batten system that you can clip an exterior finish to. In between the exterior finish and layer of insulation is an air gap that helps to add insulation value to the wall assembly. See the detail below for an example of an exterior insulated wall system.
Either one of these systems would work well for your ADU. What do they have in common? Both of these systems have thick layers of insulation that prevent thermal bridging. We recommend achieving at least an R-30 in your ADU wall assembly. Typically a rigid insulation has around an R-Value (Insulation Value) of of R-5.2 per inch. This means you will need roughly 5” thickness of rigid insulation on your assembly. An R-30 wall assembly will exceed current code minimum requirements and will help reduce building energy usage.
In most locations the cost of insulated concrete forms will be more expensive compared to the outboard insulated wall assembly. Either assembly will work, the main goal is to achieve the high insulation value. We recommend getting both systems priced out for your project.
With either selection, you will need an air tight membrane system to reduce the leakage of conditioned air from the inside of the home. This can be achieved by a stand alone air tight membrane product or a fluid applied/shelf adhering membrane that can double as the air barrier and moisture barrier.
It is important that your doors and windows have high insulation values as well. This can be achieved by specifying dual pane, thermally broken products with high R Values. Glass manufacturers can increase the insulation value of glazing by injecting argon gas between the two panes of glass and lining the glass with films. Be careful when specifying these products as many can give the glazing a color tint and reduce clarity.
In Rost Architects ADU packages we offer detailing and specifications for both the insulation/wall assembly and air tight membranes. Offering these details and construction assemblies are a small adjustment from traditional construction that make a large difference in the performance of the ADU.
Rost Architects detail showing external rigid insulation with metal panel siding.
Place your ADU on site with the proper orientation to optimize energy performance.
Orientation on the site (which way your building is facing) and utilization of overhangs to shade the south facing windows is essential for optimizing energy performance on your ADU. You want your largest glazing to be facing southward with large overhangs so they are shaded in the summer when the sun is high, but allow sun into the building in the winter when the sun is low in the sky. Below is a section diagram illustrating this concept. Based on your specific location and latitude, Rost Architects can perform site planning and sun studies to find the best location for your ADU on your property and appropriate overhang length to optimize passive solar heating and cooling.
Sun study on a Rost Architects ADU to optimize day-lighting and minimize solar heat gain.
3. Install a “Cool Roof” and use lightly colored exterior building finishes.
It may seem obvious, but finishing the exterior surfaces of a building with lighter colored materials is another incredibly effective method for reducing heat gain on a building. Your roof material is the most critical as it is in contact with the sun the majority of the day. In conventional methods of flat roof construction, roofs were often finished with a black membrane which were terrible performers in terms of reducing solar heat gain on a building. New roofing systems have been developed with lighter colored finishes that reflect the suns radiant energy before it can penetrate into the building. These systems are often called “cool roofs.” For our homes, we like to use a PVC membrane called Fibertite. Below is an image showing the installation of a PVC roof membrane being installed on one of our projects. Below the PVC membrane is a layer of rigid insulation that are sloped to provide positive drainage on the roof. In Rost Architects plan sets, we provide assembly details and specifications for a single ply PVC roof membrane so you can have a cool roof on your ADU.
Installation of a PVC Cool Roof Membrane on one of our custom homes.
4. Go Electric
For new ADU construction we recommend using only electric energy to power the structure. Use all electric HVAC systems, electric water heaters, electric cook-tops and all electric appliances. Electricity is a clean and renewable source of energy, if your ADU only needs electricity to operate, you will have the opportunity to set your ADU up to run on only the energy it produces by your solar photo-voltaic system.
5. Install Solar Panels
If the four strategies above are implemented correctly on your ADU, then the energy required to heat and cool your ADU will be reduced significantly. To offset any remaining energy demand, we recommend installing solar panels on you ADU. Solar has proven to be the most cost effective renewable energy solution on the market. The energy generated from your solar panel array can be stored in a small battery bank such as a Tesla Power wall, and used to power your all electric home and vehicles. To learn how to size your solar panel system read our article here.
If you would like more information on how to design and build a net zero energy ADU, feel free to reach out to us at https://www.rostarchitects.com/contact.
Rost Architects also offers ADU plan packages online at https://www.rostarchitects.com/adu-plans. Any of these packages can be customized to meet your specific site and requirements. Below is an example of some of our ADU prototypes.


